Iris Analysis & Iris Comparison
Our first high performance Iris Analysis system was written in 2000, at the time the system was capable of comparing one Iris against 1.5 million in a single second, with an incorrectly classified match percentage of 0.0054% (81 people in 1.5 million scanned would not be recognised). That might sound like a lot. 70 out of the 81 would simply fail to match any record on file, while the other 11 would be incorrectly classified as a different person. Not great, but orders of magnitude better than finger prints and manual facial recognition from photos.
In 2007 we revisited the algorithms, improved the systems ability to utilise a cluster of computers and benchmarked on newer hardware. A cluster of three SIMD enabled computers could handle sustained comparisons of one Iris against 120 million per second. The error rate had also improved to 0.0012%.
As of February 2013 our average error rate is down to 0.0011%. A single five machine cluster can now process at the sustained rate of 1,900 Irides against a database of 2,000 million per second.
Having cracked Iris Comparison we turned our attention to spotting fake Irises - people using special contact lenses to beat Iris Recognition systems. The "Retina" is light sensitive tissue lining the inner surface of the eye. The "Pupil" is the black bit of your eye. Light travels through the Pupil and onto the Retina. The Pupil appears black as very little light is reflected from the Retina. To spot attempts to change the appearance of the Iris we had to start looking for very fine alterations (reflections) between the slightly wet cornea (outside face of the eye ball) and the inside face of the contact lens. As light passes from one medium to another it bends. So light hits the contact lens and bends as it enters the polymer. It then travels in a straight line until it leaves the polymer to travel though a thin wet layer between the contact lens and the front of the eye ball (cornea). The cornea is partially reflective, so for a camera looking at the Iris it is possible to see both the true Iris and any fake Iris (if taking two pictures from two slightly different angles). We won't disclose anymore about this algorithm at this time, but below is the basics of Iris Analysis.
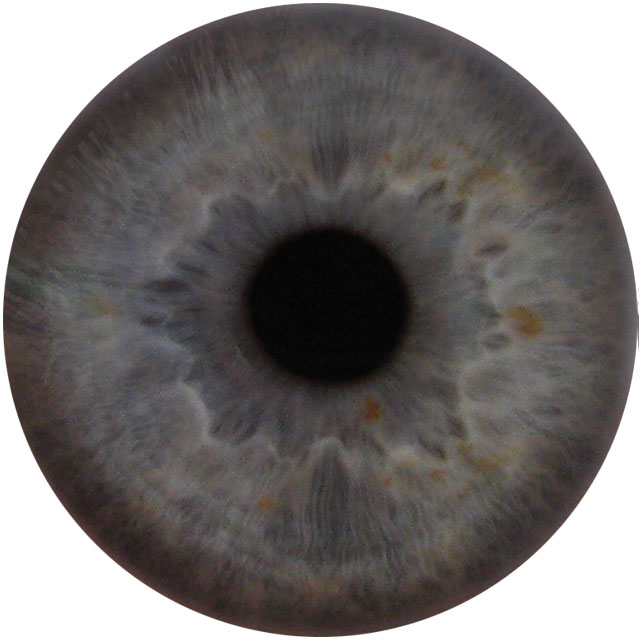
Step 1 - Photo the Iris
Does not have to be particularly high resolution, or great lighting.

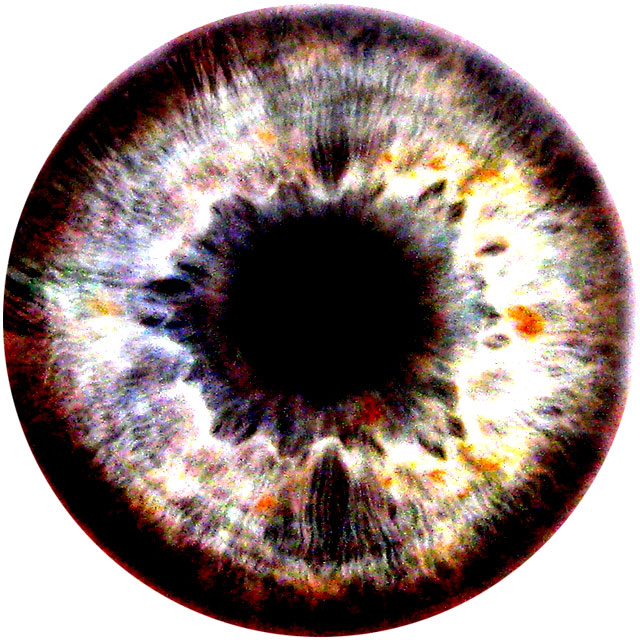
Step 2 - Enhance the Contrast
So does the following still look genuine?

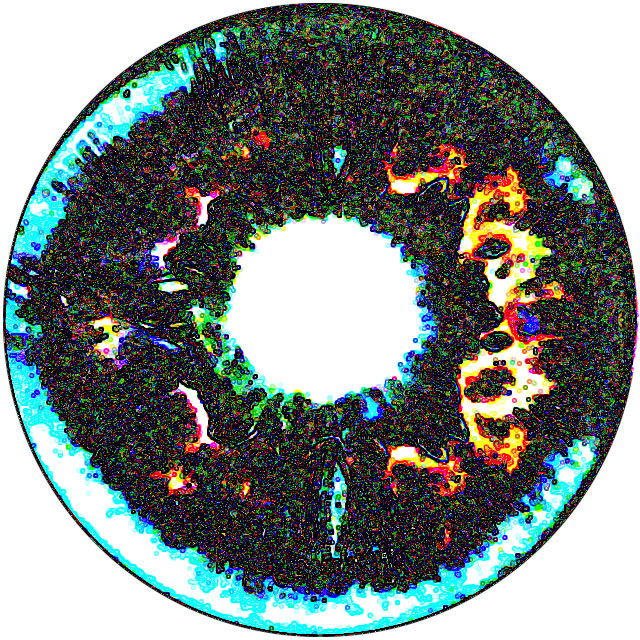
Step 3 - Run an Edge Detection Mask

Step 4 - Detect key characteristics
Basically, store the size, shape and location of each of the significant white areas.
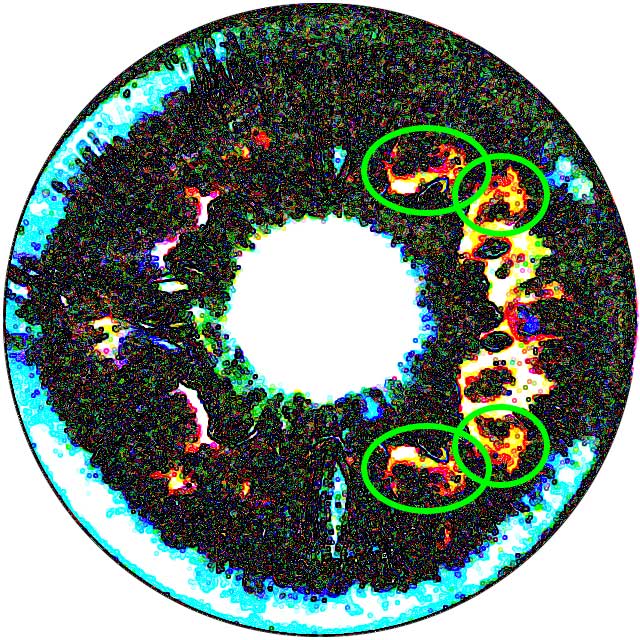
Step 5 - Look for basic fake properties
Looking at the image in Step 1 you wouldn't have spotted that this is actually a fake. The human Iris never has symmetrical properties this large - it's a fake; see the green highlights below.

So why have we just told you how to do Iris Analysis?
Each step is relatively simple, and when we explain how we do it people think it’s easy! Step 4 is the trickiest step detailed above and is key to achieving a low error rate, but quite trivial if you know about Image Recognition and pattern detection techniques. Worldwide there are over a hundred (probably over a thousand) companies that can do this. If you want an Iris Analysis system that can process at a sustained rate of 1,900 Irides per second with a database of 2,000 million Irides, with an error rate of 0.0011% that's were we may be in a class of our own.
If you are looking for a bespoke Iris Analysis solution, or want a different form of High Performance Image Recognition System, give us a call.
